A water butt is one of the easiest ways to save money, conserve water and keep your garden thriving during dry spells. But while installing one looks simple enough, there are a few common mistakes that can stop your water butt from working as well as it should.
The good news? Every one of these problems has a simple solution.
Whether you’ve just bought your first rainwater tank or you’ve had one sitting beside the shed for years, these tips will help you get the most from your investment. At Spudulica, we believe DIY should be straightforward, so here’s how to avoid the most common water butt mistakes.
Placing Your Water Butt on Uneven Ground
This is by far the biggest mistake we see.
A full water butt can weigh hundreds of kilograms, so placing it on soft soil, gravel without support or uneven ground can cause it to lean, sink or even topple over.
The fix is simple. Always install your water butt on a flat, solid and level base. Concrete slabs, paving flags or a purpose-built base provide the support needed to keep everything stable for years to come.
A level base also helps taps, connectors and diverter kits line up properly, making installation much easier.
Not Cleaning Your Water Butt
Many people install a water butt and forget about it completely.
Leaves, moss, algae and dirt can gradually build up inside the tank, affecting water quality and sometimes blocking taps or hose connections.
A quick clean once or twice a year is usually all that’s needed. Empty the tank, rinse it out and remove any debris from the bottom before reconnecting everything.
Keeping your water butt clean also helps reduce unpleasant smells and keeps your watering can free from unwanted bits of debris.
Forgetting PTFE Tape on Threaded Connections
If you’ve noticed a slow drip around your tap or connector, chances are the threaded fittings weren’t sealed properly.
Adding PTFE tape to threaded fittings before installation creates a watertight seal and helps prevent annoying leaks around taps, hose connectors and accessories.
It’s an inexpensive item that can save a lot of frustration later and takes only a few extra seconds during installation.
Not Tightening Pipework and Accessories Properly
Loose fittings can cause leaks, wasted water and unnecessary maintenance.
After fitting your tap, diverter or linking kit, always double-check that everything is secure without over-tightening. Plastic fittings only need to be firm enough to create a good seal.
It’s also worth checking your connections every few months, particularly after winter, as temperature changes can sometimes loosen fittings over time.


Leaving Your Water Butt Unsecured
A full water butt is incredibly heavy, but an empty one can be surprisingly vulnerable to strong winds or accidental knocks.
Tall, slim water butts in particular benefit from being positioned securely against a wall or fixed where recommended by the manufacturer.
If you have children or pets using the garden, keeping your water butt stable and secure provides extra peace of mind.
Installing the Diverter at the Wrong Height
Your rainwater diverter needs to be positioned correctly for the water butt to fill efficiently.
If it’s installed too low or too high, rainwater may not flow into the tank properly or could overflow unexpectedly.
Always follow the installation instructions supplied with your diverter kit and check the recommended height for your specific water butt model before cutting into your downpipe.
Taking a few extra measurements now can save having to redo the installation later.
Leaving the Lid Loose or Off
An uncovered water butt quickly fills with leaves, insects and garden debris.
It can also become a safety hazard and encourage algae growth if exposed to too much sunlight.
Keeping the lid securely fitted helps maintain cleaner water while making your water butt much safer around children and pets.
Forgetting About Winter Maintenance
Although many water butts are built to withstand the British weather, freezing water expands and can place unnecessary stress on fittings and accessories.
If severe frosts are expected, it’s worth lowering the water level and checking taps and connectors before winter sets in.
A quick inspection each autumn helps ensure everything is ready for another season of collecting rainwater.
Putting the Water Butt in an Inconvenient Location
It’s easy to focus on collecting rainwater and forget about using it.
Think about how you’ll actually water your plants. Is the tap easy to reach? Can you comfortably fill a watering can? Is it close enough to the areas you water most often?
Choosing the right location means you’ll actually make the most of the rainwater you’ve collected rather than leaving it unused.
Not Expanding Your Rainwater Collection
Many gardeners start with one water butt and quickly realise they could collect much more.
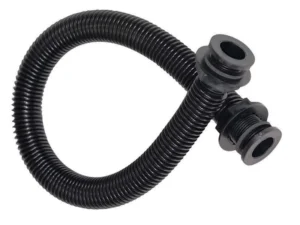
If your water butt regularly fills during heavy rain and overflows, it may be time to install a second tank using a linking kit.
Connecting multiple water butts allows you to capture significantly more rainwater without changing your existing setup, giving you a much larger reserve during dry summer months.
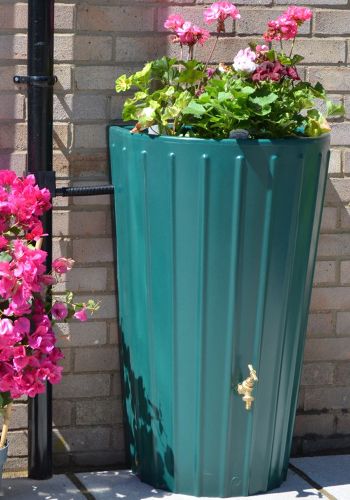
Make Your Water Butt Work Smarter
A well-installed water butt should quietly do its job year after year with very little maintenance. By avoiding these common mistakes, you’ll collect more rainwater, reduce leaks, improve safety and spend less time fixing problems.
Whether you’re installing your very first rainwater harvesting system or upgrading an existing one, we’re here to help make every drop count.
So before the next rain shower arrives, take a few minutes to check your setup. A handful of simple improvements today could save you water, time and money for many seasons to come.